Setting Up Your Node for Lending on NodeAI
Becoming a node provider on NodeAI involves a clear and secure setup process. Follow these steps to prepare your node for our network.
Pre-Setup: SSH Server Configuration
Before proceeding with the main setup for lending on NodeAI, it's crucial to establish a secure SSH server. This setup will involve installing the SSH server, generating a new ED25519 key pair, and configuring it as an allowed key for the root user. Follow these steps to complete the pre-setup stage.
Requirements
Ensure you have the following before starting:
- A system running Debian/Ubuntu.
- An NVIDIA GPU with CUDA support.
- Sudo privileges or root access.
Step 1: Installing SSH Server
First, update your package index and install the OpenSSH server package:
sudo apt-get update
sudo apt-get install openssh-server -y
After the installation, the SSH service should start automatically. You can verify it's running with:
sudo systemctl status ssh
Step 2: Generating SSH Key Pair
Next, generate a new ED25519 SSH key pair for secure authentication:
ssh-keygen -t ed25519 -a 100 -f ~/.ssh/id_ed25519 -C "root@node"
When prompted, press enter to leave it empty. This command generates a new ED25519 key pair stored in the ~/.ssh/ directory.
Step 3: Configuring SSH Key
For the root user to use the new key pair, add the public key to the authorized_keys file:
mkdir -p ~/.ssh
echo $(cat ~/.ssh/id_ed25519.pub) >> ~/.ssh/authorized_keys
Ensure correct permissions for the SSH directory and the authorized_keys file:
chmod 700 ~/.ssh
chmod 600 ~/.ssh/authorized_keys
Step 4: Enabling Root Login via SSH
Edit the SSH configuration file to permit root login with SSH keys:
sudo nano /etc/ssh/sshd_config
Find the PermitRootLogin line and modify it to:
PermitRootLogin prohibit-password
This setting allows root login only with SSH keys and not with passwords. After saving the changes, restart the SSH service to apply the new configuration:
sudo systemctl restart ssh
Your SSH server is now configured with a secure ED25519 key pair for the root user. You can now proceed with the rest of the NodeAI lending setup process.
Ensure to keep your private key secure and accessible only by authorized users.

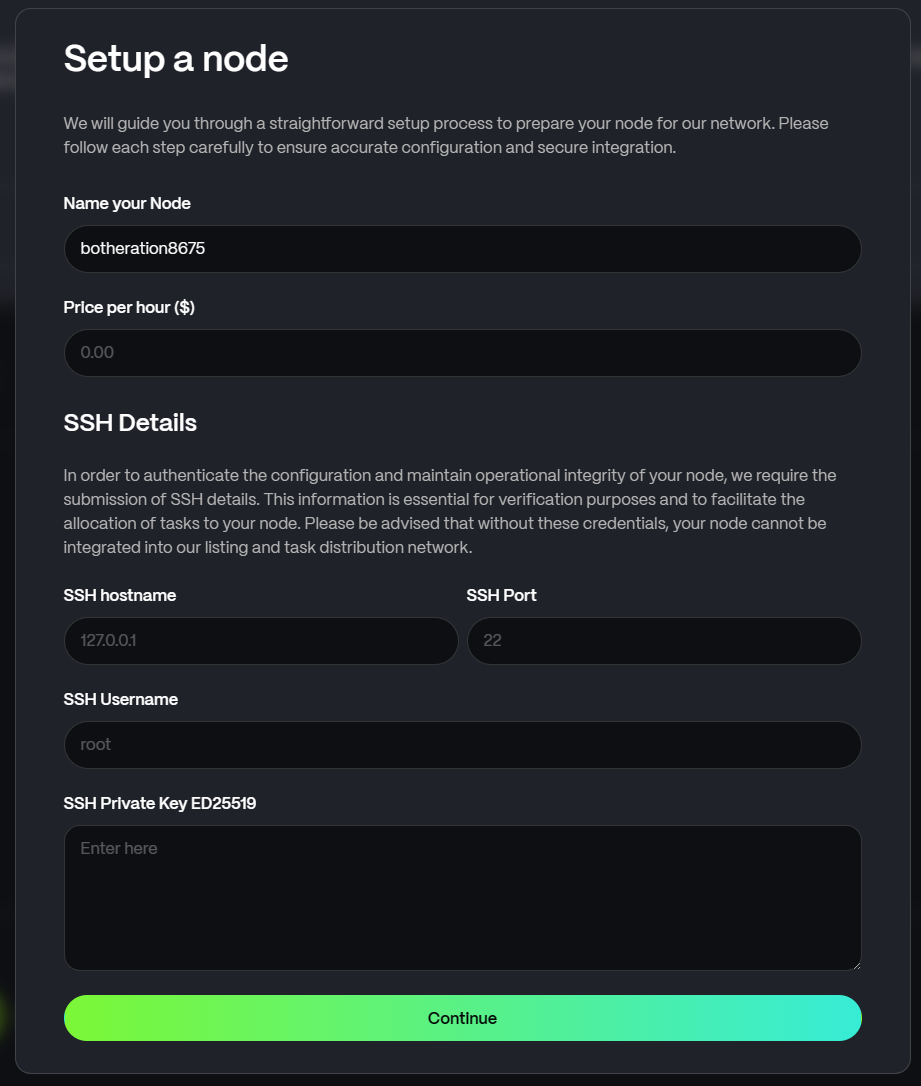
Step 1: Initial Setup
-
Name Your Node: Assign a unique name to your node for identification within the network.
-
Set Your Price: Decide your node's hourly rate that users will pay when renting your GPU resources.
-
Provide SSH Details: For secure communication, enter the necessary SSH details:
- SSH Hostname: The address for SSH connections to your node.
- SSH Port: The port number used for SSH connections (default is 22).
- SSH Username: The username for SSH login.
- SSH Private Key: Your SSH private key for secure access.
Complete these details on the Node Setup Page.
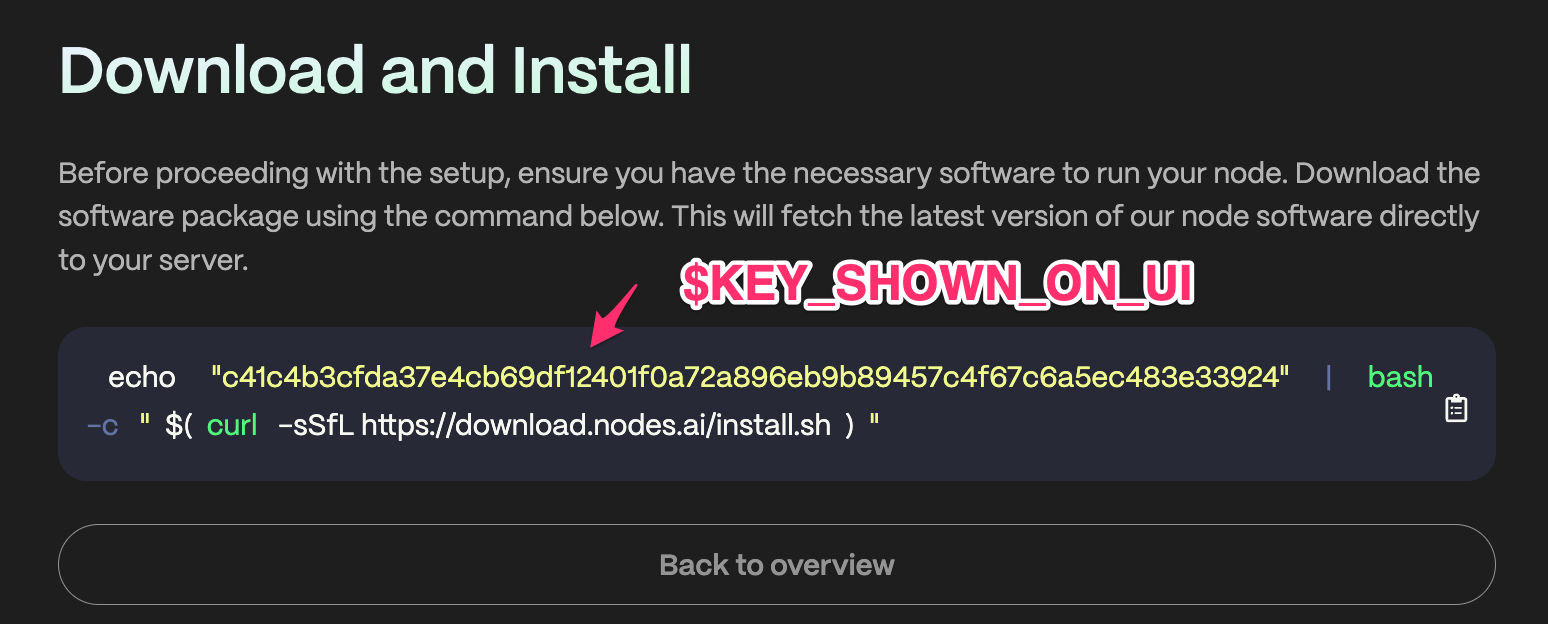
Step 2: Downloading and Installing Node Software
After Step 1 is completed the system will push the NodeAiCtl Software to the server and start the installation process.
For Manual Installation
Before initiating the node setup, ensure you have the necessary software by executing the following commands:

echo "$KEY_SHOWN_ON_UI" | bash -c "$(curl -sSfL https://download.nodes.ai/install.sh)"
These commands will download and extract the latest version of the node software to your server and run it, P.S When adding Node the software will be installed and started automatically.
Execute the setup script with the unique key provided. This script will install all necessary packages and configure your node to communicate with our network.
Please follow each step carefully and reach out to our support team if you encounter any issues. Once completed, your node will undergo a review process.
For a detailed guide and assistance, visit our comprehensive setup documentation here.